

You Will Need:
4 Massive Cedar Logs Big, Bad Post Hole Digger
from Your Awesome Grandpa


Little post hole digger and shovel One potentially rabid (ha!)
3-legged dog


You will also need:
- 1 roll of 4-foot by 150-foot chicken wire
- Fence staples and nails
- Hammer, wire snips, and whatever other miscellaneous tools you might find helpful
- A half decent radio
- Some type of saw (power saws preferable)
- Probably a bunch of other stuff I'll forget about till later
STEP 1:
Choose the steepest slope on your property and stake it off to be 8 X 8.

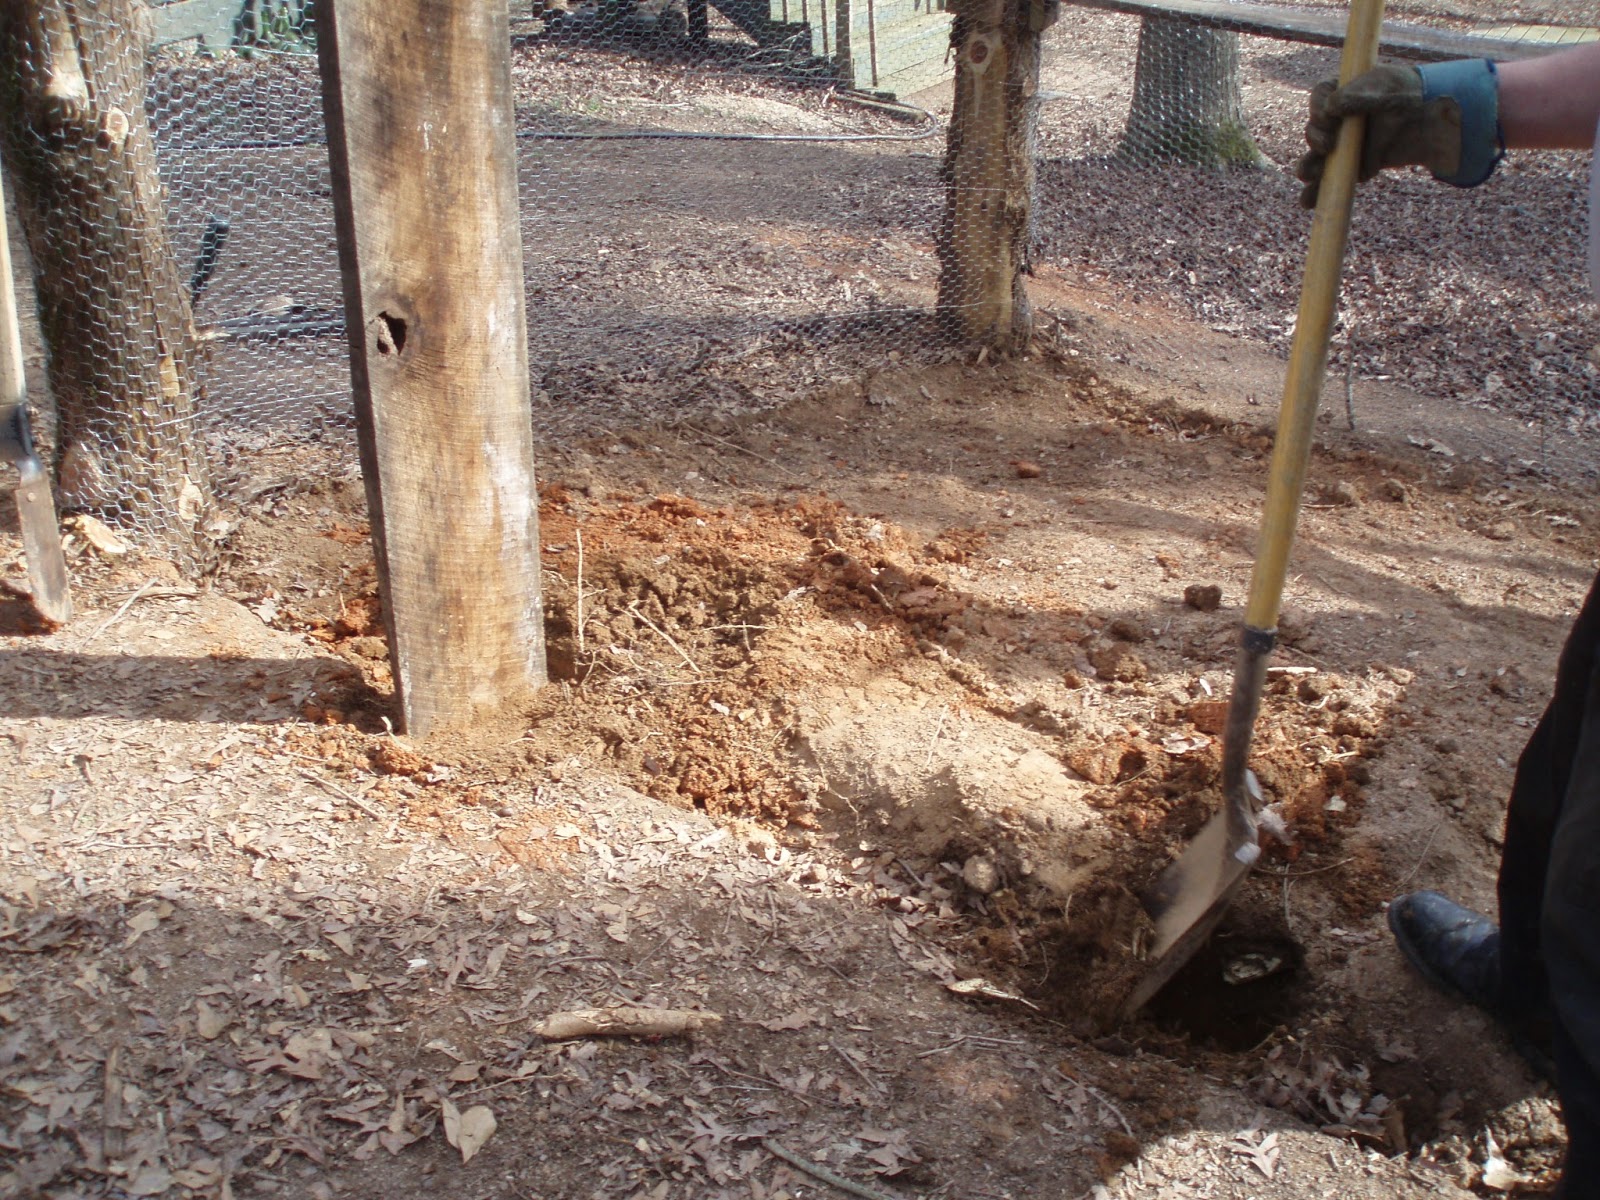
STEP 2:
Use big, bad post hole digger to dig a 2-foot deep hole. Then use shovels to dig it out wide enough to accommodate your massive cedar logs.

STEP 3:
Plant your cedars. Or erect your posts...whichever way suits your fancy.

STEP 4:
Repeat three more times.

STEP 5:
Dig a trench so you can fold and bury your wire later. Be a dummy and only dig it on one side of the posts despite the fact that you're building a double pen.

STEP 6:
Go grab your maul and deal with pesky roots. Save maul...you will need it for a later step.

STEP 7:
Embrace the idea of child labor. Be warned...10 year old's think that 5 minutes of digging constitutes a full day's work.
STEP 8:
Spend the next 3 hours trying to figure out how to attach chicken wire between two posts that slope away from each other and still have the wire touching the ground at all points. Once you figure that out, grab a piece of raw lumber, also from your awesome Grandpa, and brace it between the posts. Attach the wire and bury it.

STEP 9:
Attach wire to the inside of the posts for a total of 3 sides. Leave one side open so you can build a door later. Apologize to curious dog for what you are being made to do.

STEP 10:
This step is CRUCIAL for the ugly factor. Do not skip this step if you want an ugly pen. Lay roll of chicken wire on the ground and bend it as much as possible. Inadvertently throw your maul on top of it for good measure. This makes the wire much more difficult to work with and impossible to stretch properly, but it just won't be as ugly if you don't do it. Begin attaching wire to the outside perimeter of the posts. Repeat for 3 sides.

STEP 11:
Because you were a dummy back in step 5, and because you did not realize this until AFTER you'd already attached your wire to the outside, roam around the yard harvesting stout sticks that you can use to stake the bottom of the wire to the ground. Stake wire. This helps enhance the ugly factor.

STEP 12:
Sit on the ground begging your back, legs, hips, hands, arms, shoulders, and the rest of your body, to forgive you this abuse. Admire your handiwork and call it a night--or morning in this case.

STEP 13:
Cut 2 pieces of stout, raw lumber to use as a door frame. Bury lumber about 18 inches deep.
STEP 14:
Cut 2 more pieces of raw lumber to fit between the cedar posts and either side of the door frame. Attach securely. Cut one piece of lumber to bury behind door to keep doggie from scratching at door. Attach chicken wire. (not pictured)

STEP 15:
Spend several days trying to figure out the best way to put a door on this here deal considering the fact that you have built your door side into an upward slope and it has to be double like the rest of the fence. Come up with the seemingly stupid, but ultimately brilliant idea of building a drawbridge. Have your husband engineer said drawbridge and attach it with a dowel so that it will pivot. (We are particularly proud of our little gate!)


STEP 16:
Finish attaching chicken wire to the outside of the pen and SING AND REJOICE!!!! Devise a locking mechanism for the gate by drilling out holes for two small pieces of dowel on either side. Use old leather belt to ensure dowel locks never get lost. Use remaining belt to create a handle. Yes, my hubby is a genius! :)


STEP 17:
Purchase one and a half times the amount of wheat straw you actually need to cover the floor of the pen. (Shown with amount needed already used.)

STEP 18:
Build an awesome dog house, complete with covered porch and columns. Use the most warped lumber you can get your hands on to ensure that it will never square up no matter what you do. Decide that you don't care...it still looks awesome despite the warped wood.


STEP 19:
Take a bird's eye view to admire the fruits of your labor. :) Ignore the fact that it's uneven...so long as it does its job, we're good.


STEP 20:
Feel sorry for your poor little dog and apologize again. :(

And there you have it: how to build the ugliest dog pen in the world. This pen cost us a grand total of $100 plus the gas money out to my Grandpa's and back. That's it. The same sized prefab pen would have cost well over $500 by the time we bought two to meet the double-pen requirements. It's not pretty, but it works and we did it. I'm pretty proud of it, personally. :)
With that behind us, perhaps I can get back to my regularly scheduled program of coke addiction, sleep issues, and trying to become a healthier person. If nothing else, though, this little project of ours gave me more exercise than I've had in a while. ;) I did promise a post explaining chronotherapy, and I will deliver on that promise soon. I plan to start next Friday if all goes well, so details will be coming. Until then...
Reading through these steps, it looks easy.
ReplyDeleteLOL...I thought the same thing. People need not be deceived, though...this was TOUGH!! Thank you for doing this with me and being such a brilliant man. I love you so much! <3
ReplyDeleteLoved reading this and seeing the pictures!! Kept us laughing all the way through!! Looks like you all did a great job. Love the gate....your little dog even has a shelf for her bones...LOL! She seems to be quite content in her new home. I think this is my favorite post so far!!
ReplyDeleteThanks, Mama! I thoroughly enjoyed writing this one--was a lot of fun. What we had to do to make this post possible was not nearly as fun as writing it, though--lol. Still, it was an experience and I'm enjoying seeing the end result. :)
ReplyDeleteWell worth the effort. Your pup has a great mom!
ReplyDeleteThanks, Nancy! :)
ReplyDelete